With the fall and winter skating seasons quickly approaching, we figured we’d address one of our most frequently asked questions:
“How do I lace these things??”
You think you know how to tie a shoe, until the shoe becomes a bit longer and taller - and also has a blade with a toepick mounted to it!
We’re here to help with our 6 best go-to tricks to making putting skates on (and taking them off) an absolute breeze.
We’ll also help some common comfort issues. Remember: skates should not hurt!
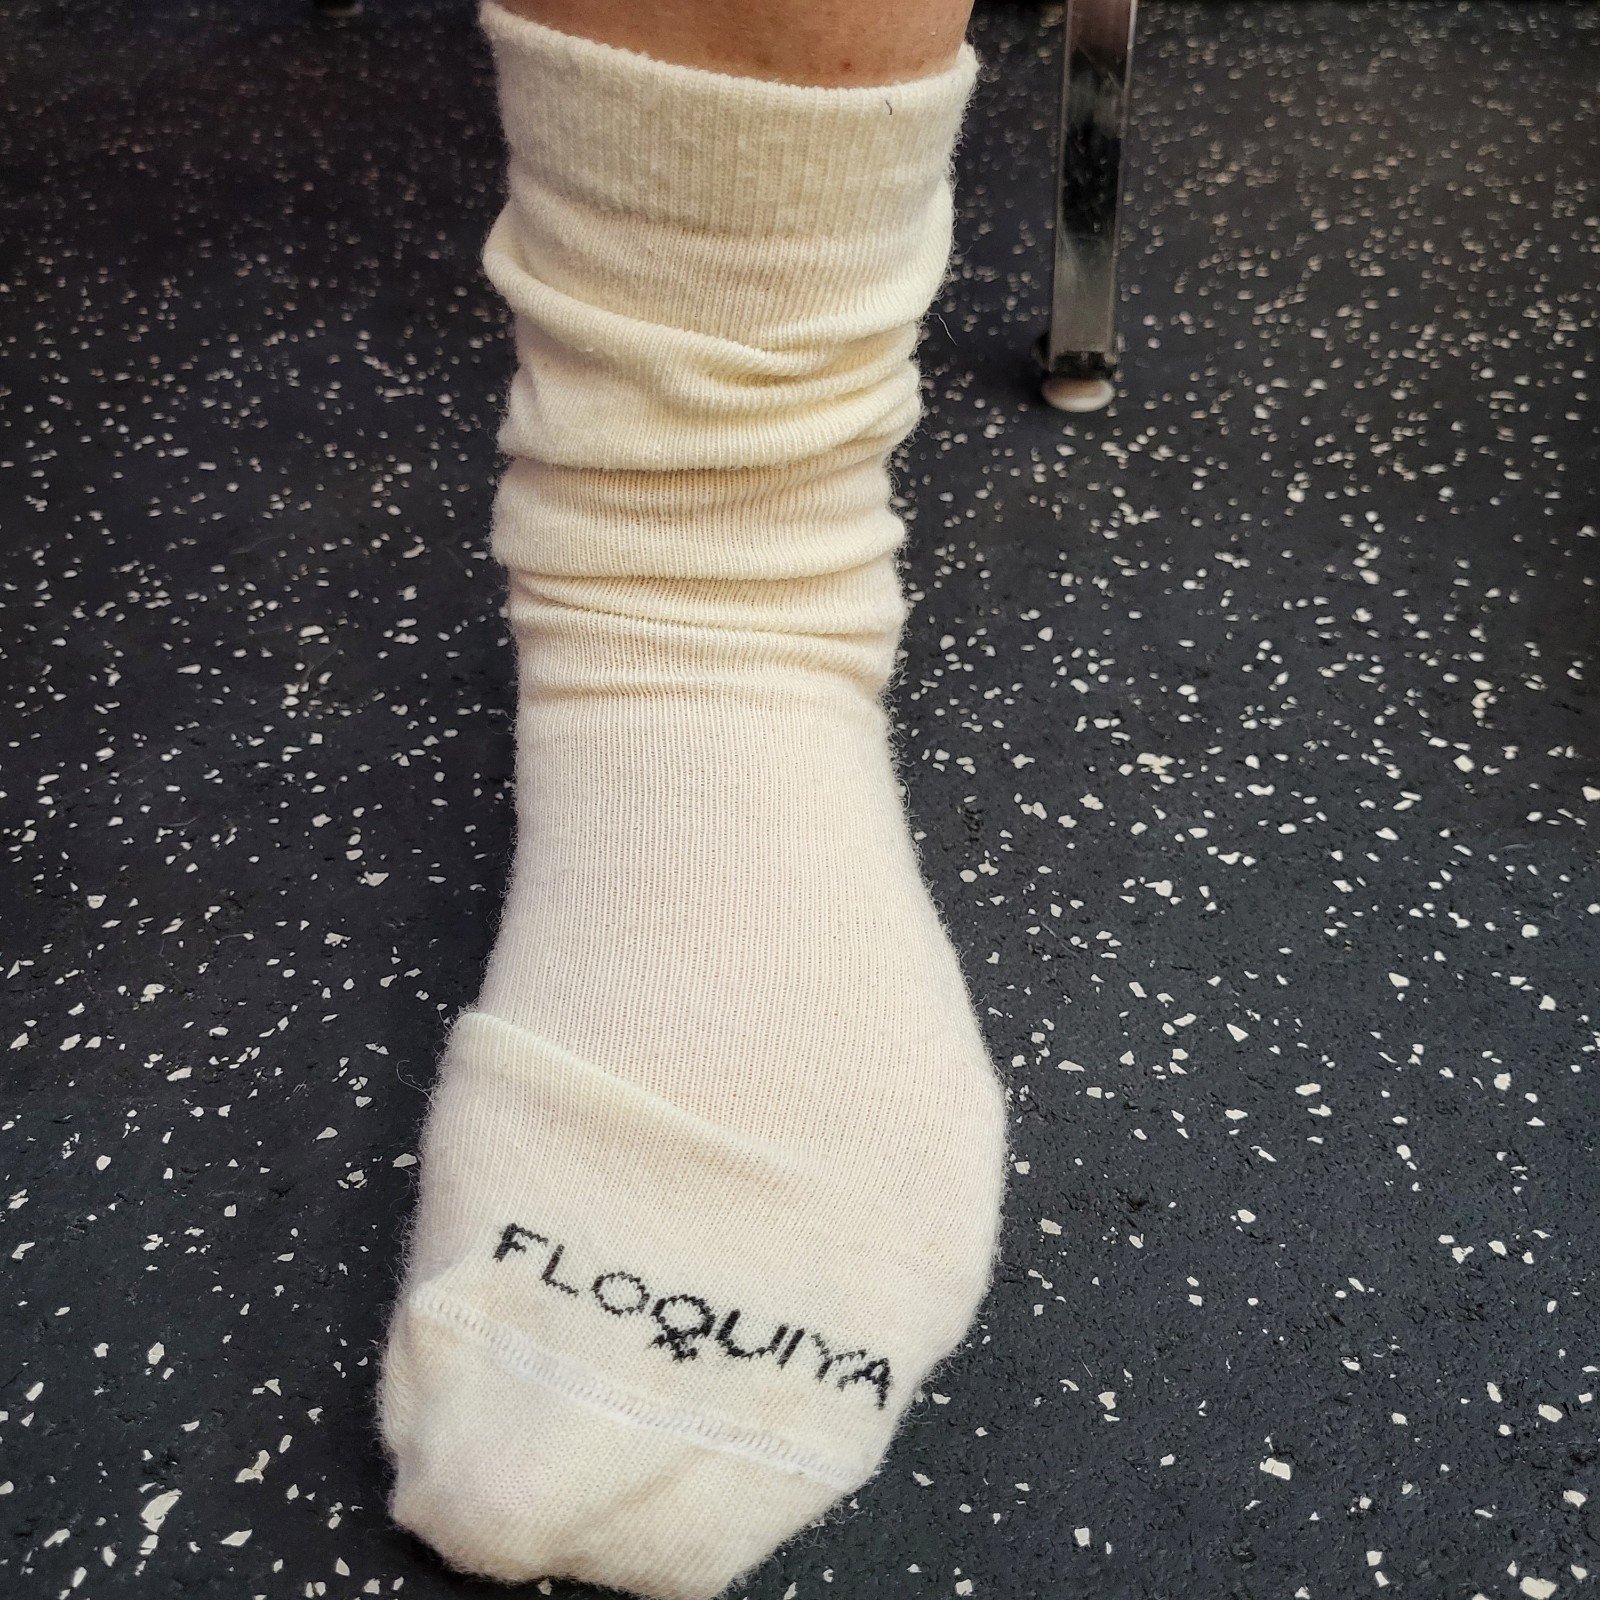
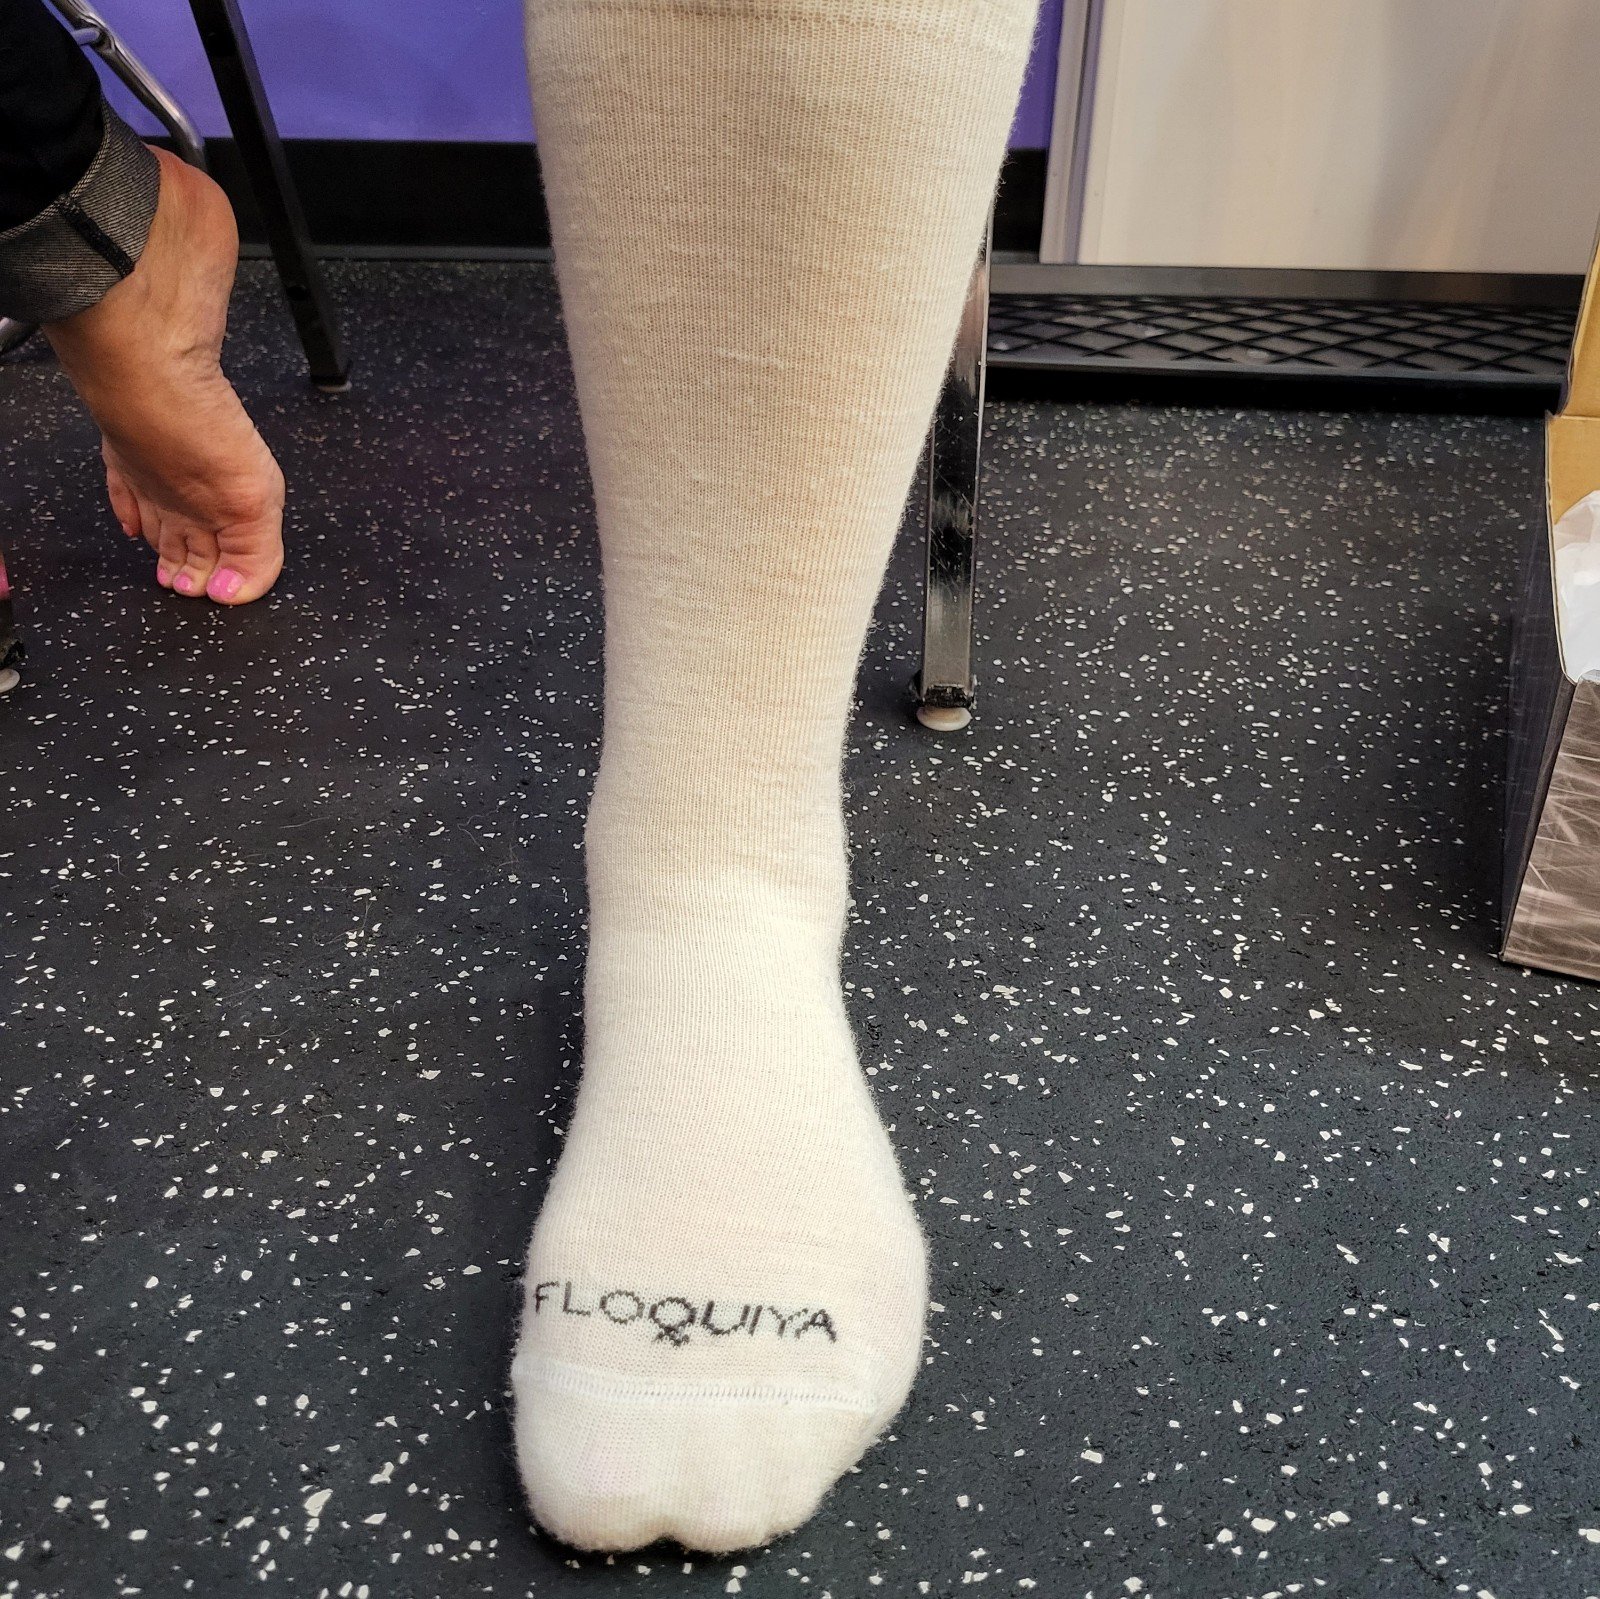
1. Fix the Socks
When socks are bunched and wrinkly they won’t feel so good in skates.
Our suggestion for socks is the thinner, the taller, the better.
So smooth the sock up the length of the foot.
Make sure the toe seam is laying as flat as possible across the toes.
Make sure the sock isn’t pulling on the toes and making them curl.
And tug the collar up the shin as far as it can go comfortably with no wrinkles in the material.
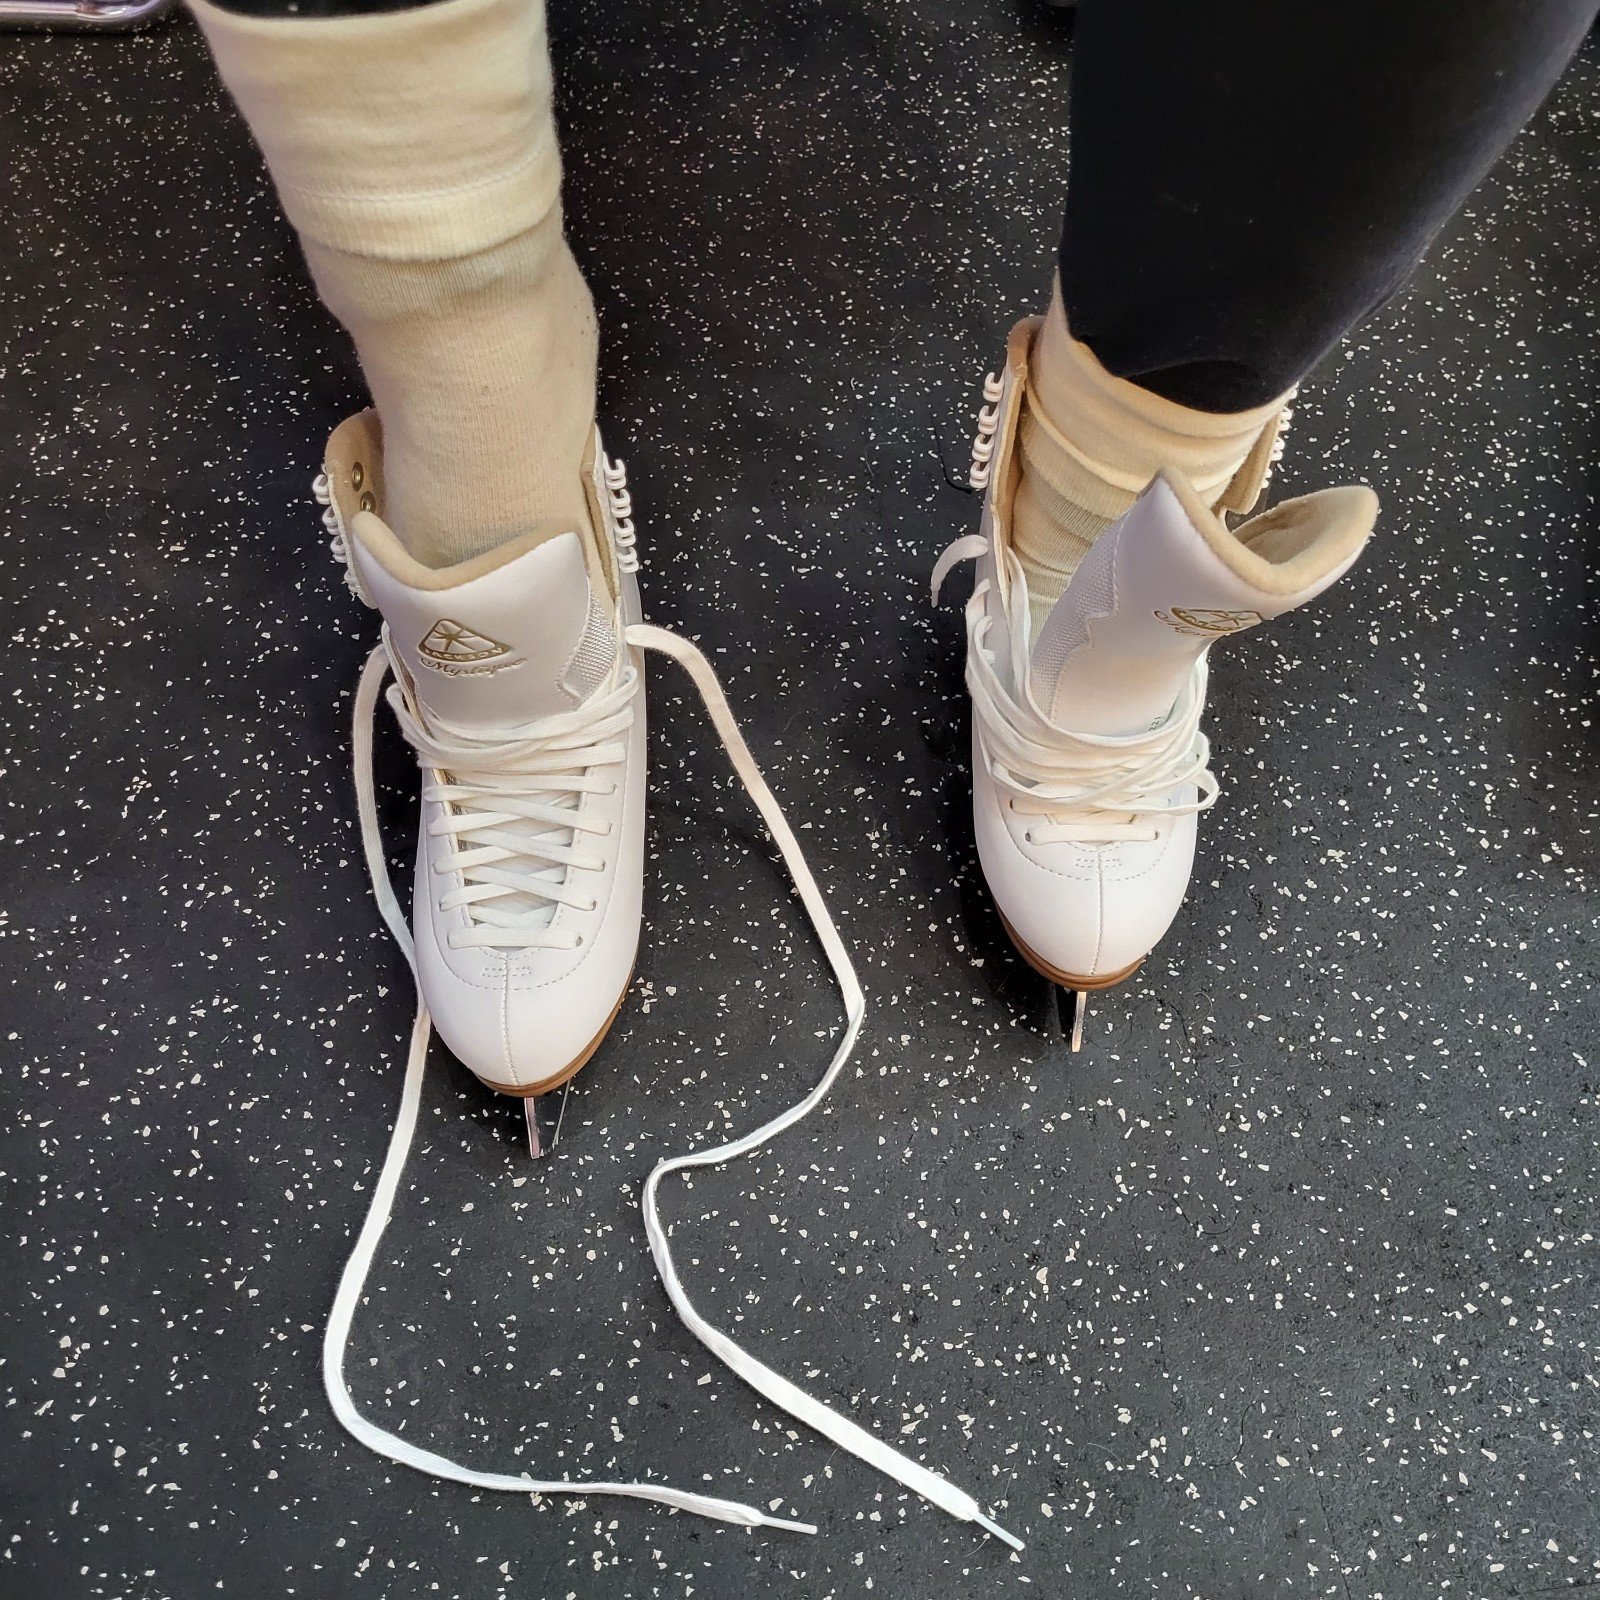
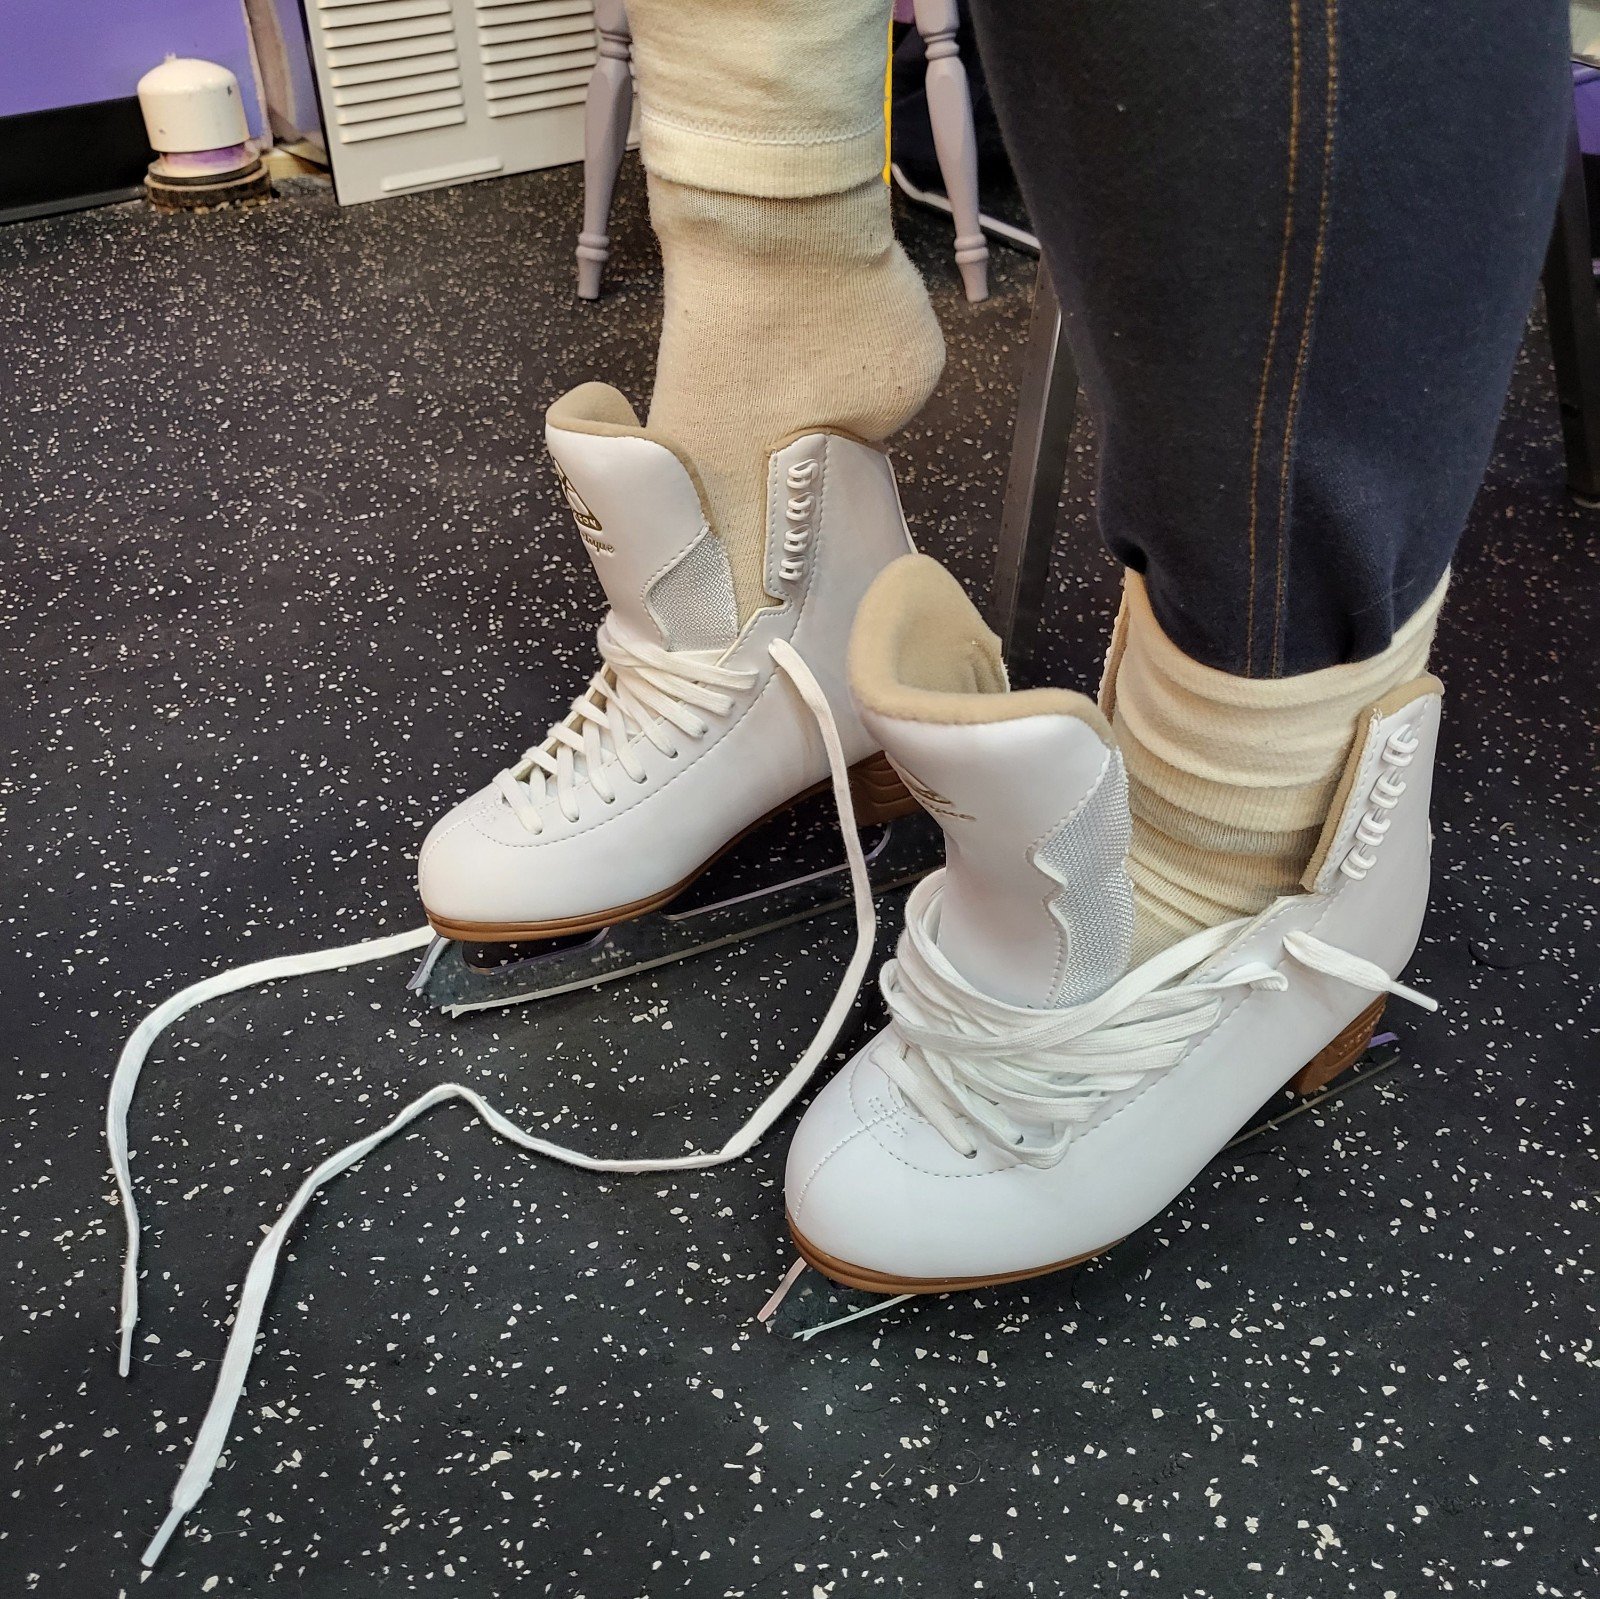
2. Open the Skate
Make getting the foot in the skates as easy as possible!
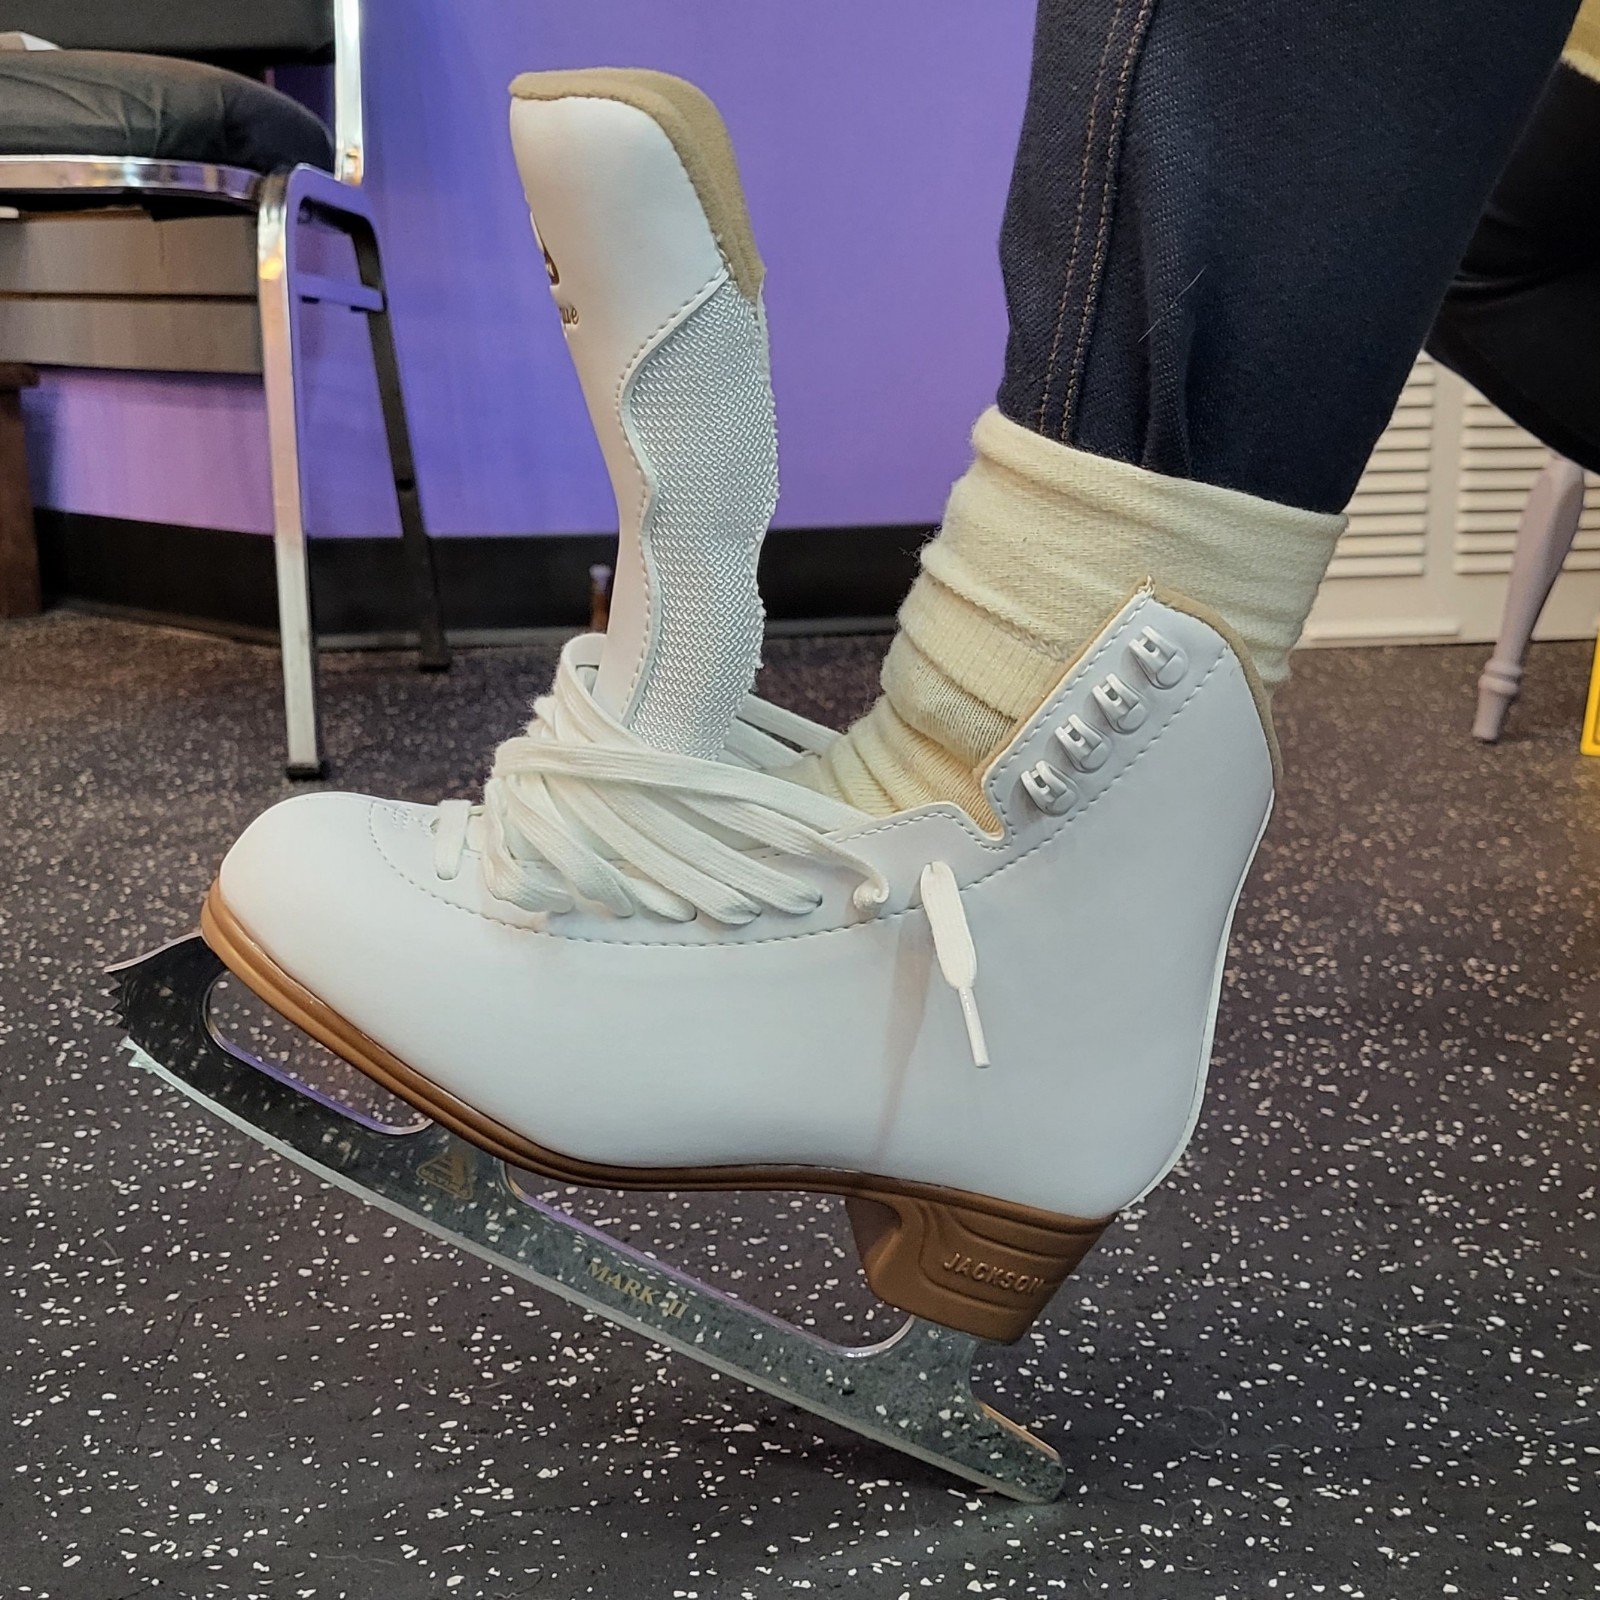
See how the foot pictured on the left is stuck at the top of the skate?
But the foot on the right is all the way down!
Loosen the laces as much as you can to make a wide opening to slide the foot into.
Pull the first loop very long, the next loop half as long, and so on to the middle of the skate, or all the way down as pictured on the foot on the right.
Make the tails of the laces short— 2-3 inches will be perfect.
If you’re afraid to lose the tail of the laces through the eyelets, make a small knot at the end of the aglet (plastic lace tip).
This should work much easier than keeping the skate closed!
3. Foot Flat, Tap Tap!
Our favorite catchphrase!
Once the foot is in the skate, lean down into the footbed to make sure the foot is pressed all the way flat in the boot.
Next, get the heel back.
Lift the toe of the skate so the heel is the only thing touching the floor, and then (carefully!!) tap it back a couple times to seat the heel of the foot into the heel cup of the boot.
Go ahead and tap it firmly, being aware of surroundings and safety! You won’t hurt the skates, we promise.
Making sure the heel is secure is one of the most important parts of how the skate boot holds your foot.
Don’t skip this step!!
4. Lace with the Toe Tipped Up
After the skater has tapped their heel back, FREEZE!
Keeping the toe up and the heel down is a great position to lace in.
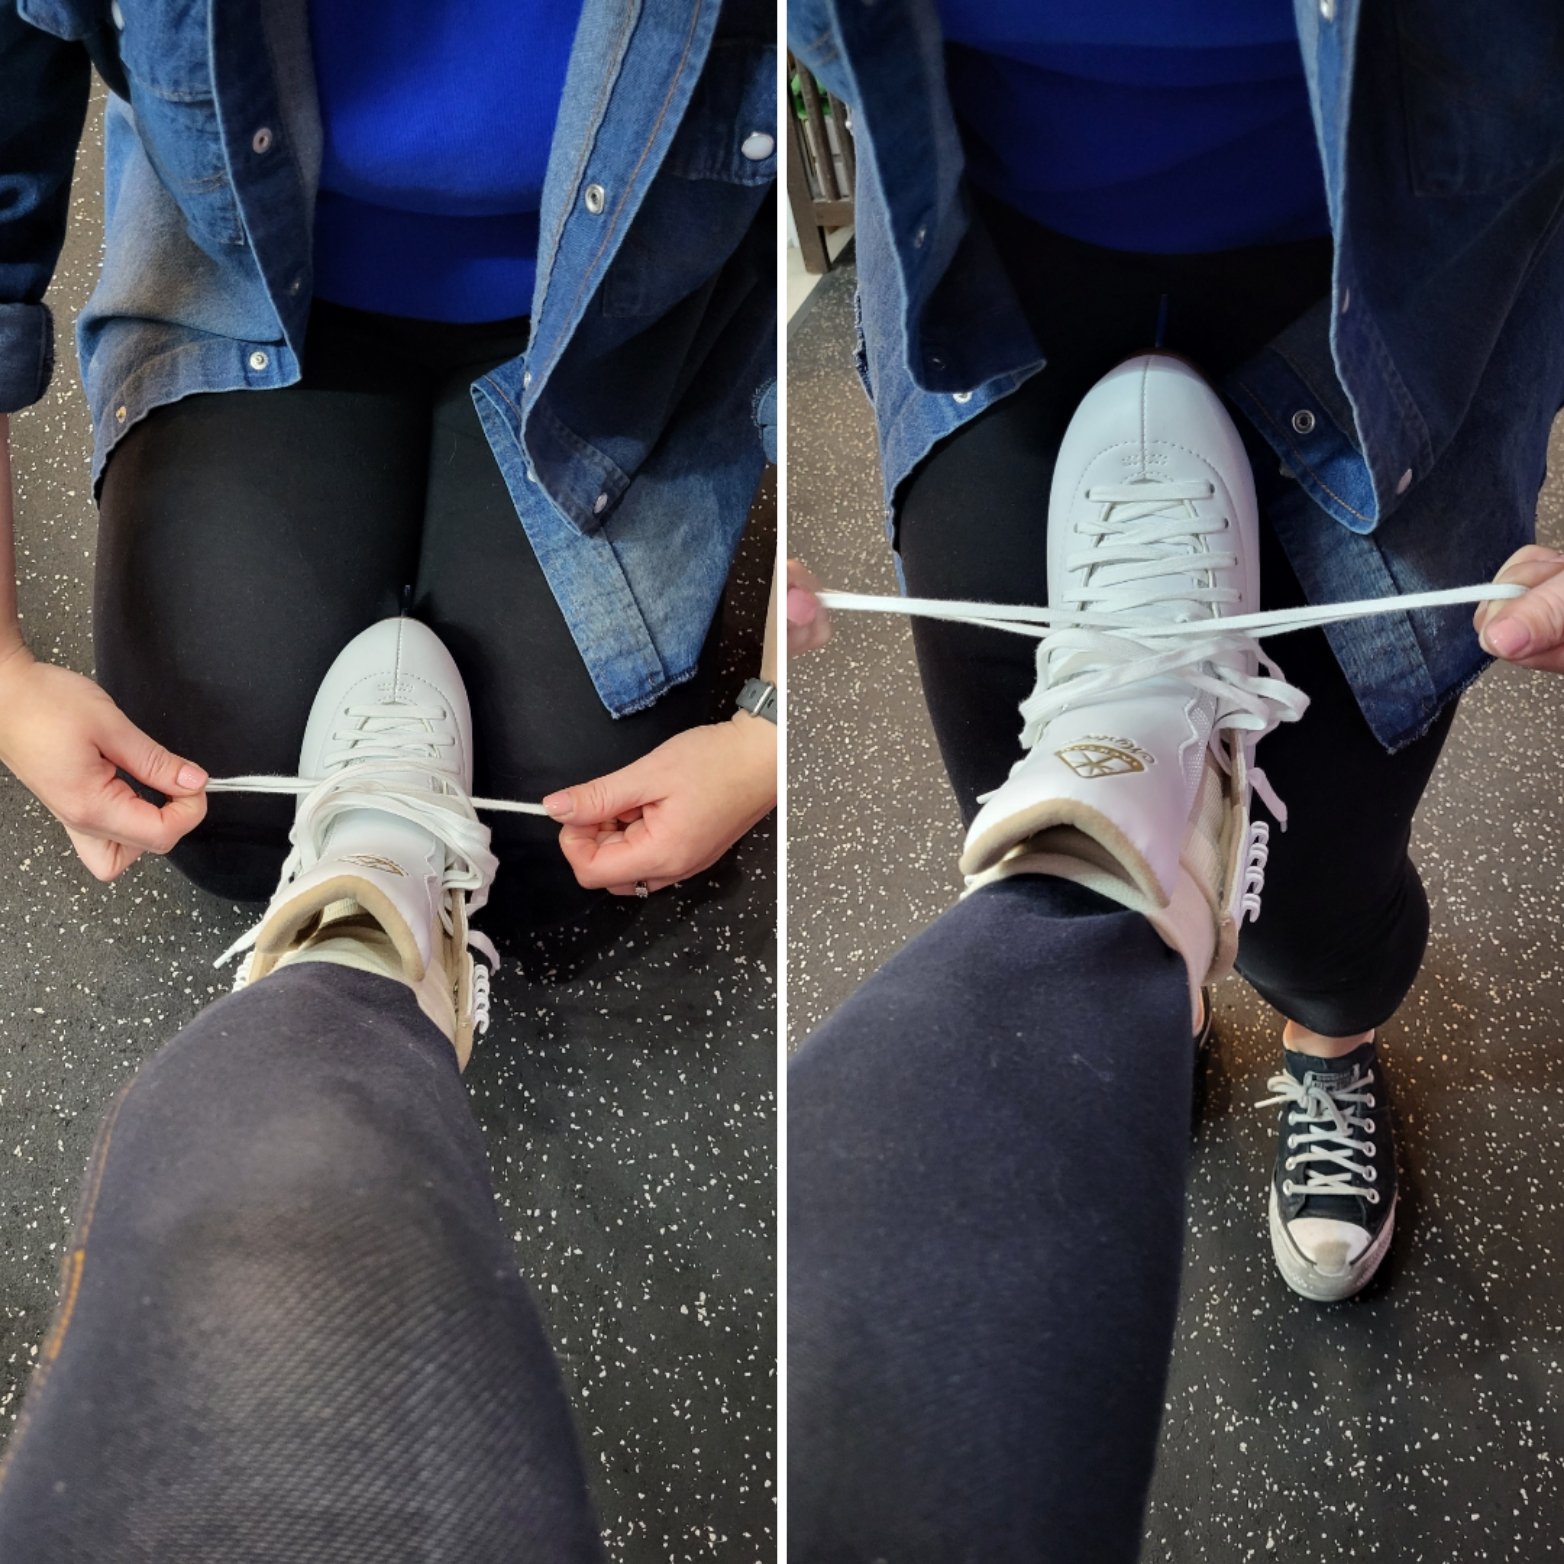
When the skater’s legs are long enough to reach the floor, lacing braced with the heel on the ground is Claire’s preference for lacing. This position on the left photo ensures total control of the foot.
The crouched position pictured on the right is how Dawn laced up Claire’s skates as a kid. This would work well for parents or guardians who can’t kneel on the ground easily.
Either way, make sure that heel doesn’t get unlocked while lacing!
5. Follow Our Suggested Lacing Pattern
There’s all sorts of different strategies out there for lacing figure skates.
There’s even a brand of skates that has a mandated lacing system or their boots won’t behave properly!
For most beginner and rental skates, the most important factor is to keep the toes comfy, start to secure the midfoot, and lock down the heel.
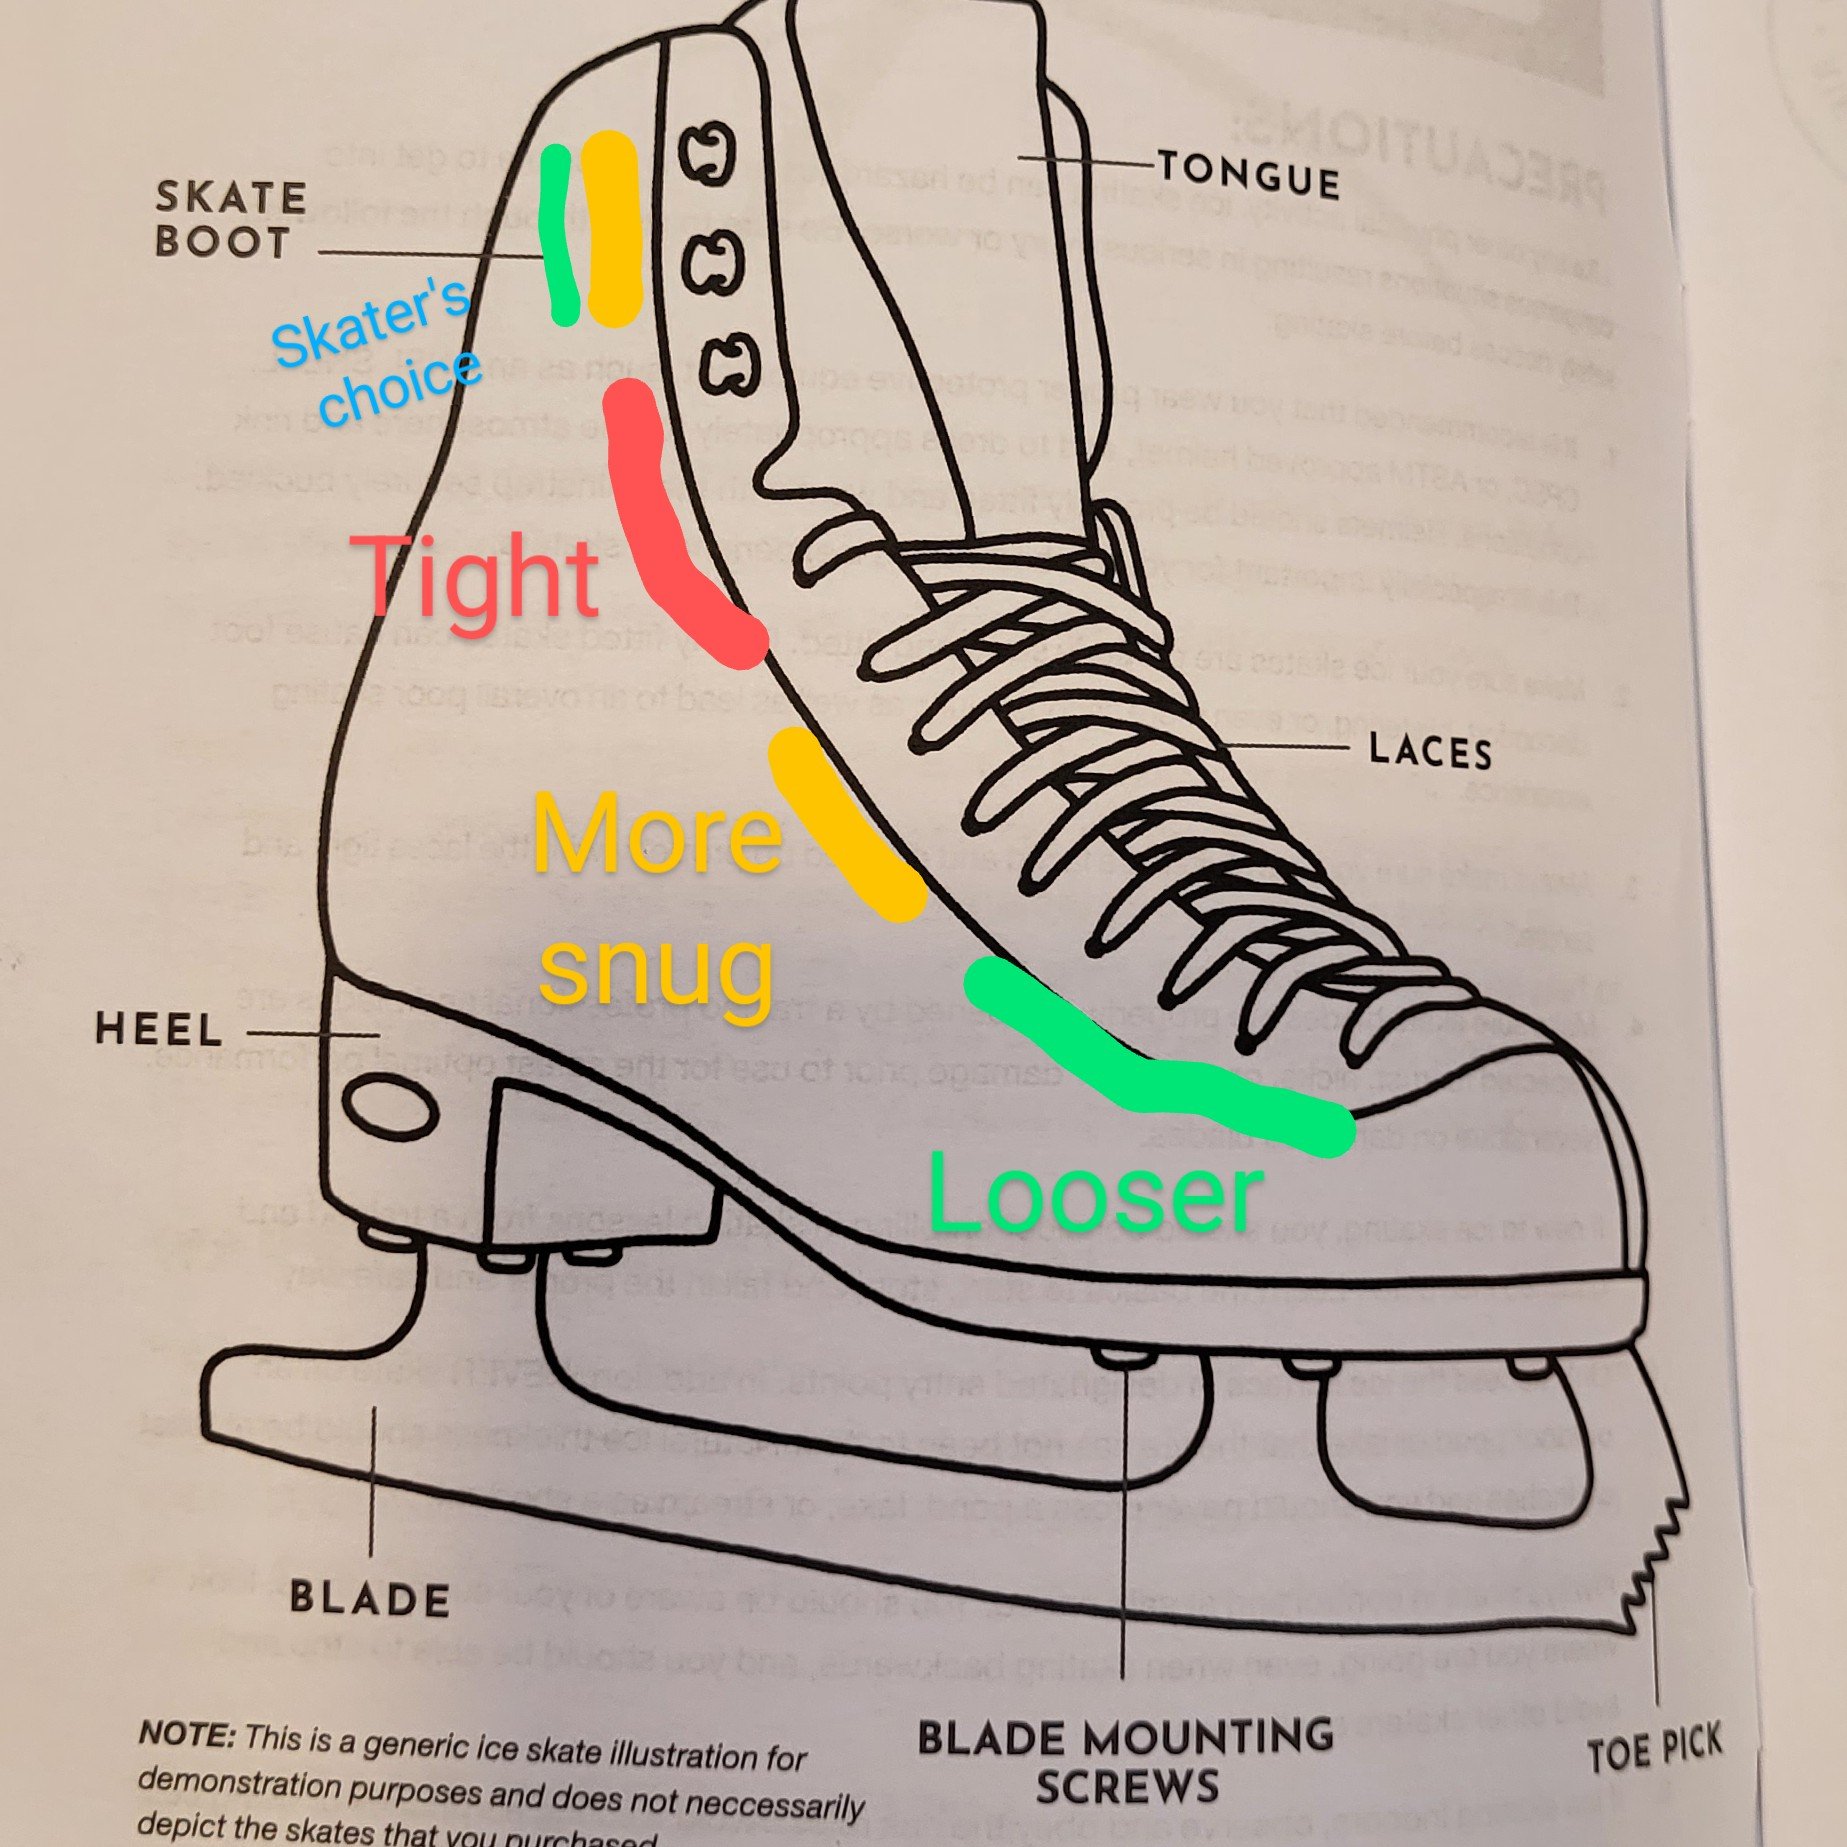
That’s what our suggested lacing pattern pictured here offers!
Putting light tension on the laces at the toe makes sure the boot doesn’t crunch the toes too much.
Increasing the tension in the middle of the foot brings the skate closer for control.
The last two eyelets/holes and the first hook should be the tightest part— as tight as the skater can stand without being painful or cutting off circulation.
Skaters may say that area is too tight, but there’s a limit to how loose the laces can be and still maintain control of the skate. Coaches and more experienced parents at the rink can help on-site, and you can always ask us as well!
Communicate with your skater to see what works for you.
6. Use Free Hand to Tighten Velcro or Buckles
For rental skates or beginner skates they sometimes have buckles or velcro fastenings.
They follow the same fastening guidelines as laced skates do.
Easy on the toes, snug the middle a bit more, and then get the top nice and secure.
To do that, we suggest using both hands.
Use one hand to grip either side of the ankle and squeeze gently as the other hand pulls the strap through, or pushes the buckle closed.
Again, there is a limit to how loose the top section can be while still maintaining control of the skate, so keep it snug!
The first few skating lessons can be tricky to navigate, and we’re here to help however we can!
The most important thing to remember is that skates shouldn’t hurt.
If a skater is complaining of prolonged pain that’s never good. Skates may feel a bit funny or uncomfortable to begin with, but it should abate while skating or within a few lessons.
When something’s not right with your skates, turn to the figure skating specialists at Skater’s Edge to help you problem solve.
You can get on our calendar for all sorts of appointments including fitting for New Skates or a Comfort Adjustment for your skates by using this link here!
Happy Skating!
The Skater’s Edge is Buffalo and Western New York’s figure skating boutique and service center. We've been living the skating lifestyle since 1998 and now we fit skaters for ice skates, competitive figure skates, and take care of skate sharpening for all levels of skating. The skate shop carries Aura, Edea, Jackson, and Riedell skates, as well as skating apparel and accessories. With technicians trained by a master sharpener of over 30 years, trust The Skater’s Edge with your next figure skate fitting, figure skate sharpening, hockey skate sharpening or hockey skate repair, as well as shaping your hockey blade radius or profiling.

